 Pin It
 The first whiff of warm chocolate drifting from my kitchen last May still makes me smile—who would have guessed that baking brownies in little garden pots would bring this much delight? The house filled with a gentle hum: the clatter of pans, the laughter at Oreo crumbs dotting every surface, and the excitement of carefully placing each edible flower. It’s not just dessert; it’s a playful afternoon, hands sticky with batter and hearts set on surprise. The moment those colorful pots landed on the table, nobody could resist grinning. Suddenly, Mother's Day felt even sweeter—almost literally blooming in front of us.
One spring morning, I tried these for a brunch where my mom and her friends lingered over coffee—watching them giggle and compete for the pots with the prettiest flowers is a memory I’ll always keep. That day the real gift was seeing a roomful of grown-ups transformed into kids, admiring their treats before finally digging in.
Ingredients
- Unsalted butter: Melting it gently makes sure the brownies stay rich and tender—don’t rush this part.
- Granulated sugar: Gives the brownies a shiny, crackly top; I learned it’s worth whisking it in thoroughly.
- Eggs: Add structure and extra gooeyness, so let each one mix in before adding the next.
- All-purpose flour: Adds just enough body to keep the brownies sturdy for slicing and layering.
- Unsweetened cocoa powder: Use a good-quality brand for the deepest chocolate flavor—my biggest taste difference came from this swap.
- Baking powder: Lifts the brownies for that soft, cakey middle.
- Salt: Rounds out the chocolate; a pinch goes a long way.
- Vanilla extract: Turns up the warmth—pure vanilla is worth the little splurge.
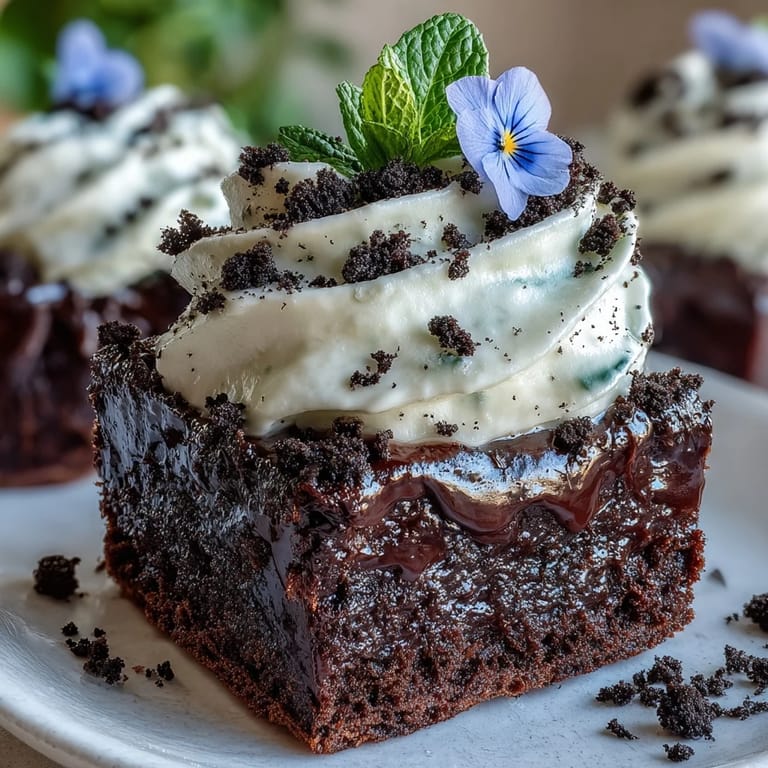
- Oreo cookies: Double-stuffed or classic both work—just make sure to crush them fine for that “dirt” effect.
- Heavy cream: Whips into cloud-like topping, creating a perfect cushion for the “soil.”
- Powdered sugar: Helps the cream hold peaks without graininess.
- Edible flowers and fresh mint: Always check they’re food safe—picked fresh, they’re pure magic atop the pots.
Tired of Takeout? 🥡
Get 10 meals you can make faster than delivery arrives. Seriously.
One email. No spam. Unsubscribe anytime.
Instructions
- Prep your pots and oven:
- Heat your oven to 175°C (350°F) and line your mini pots with parchment if they’re oven-safe, or set up a baking pan.
- Melt and mix:
- Let the butter melt slowly in a saucepan, then whisk in the sugar and vanilla—listen for that gentle sizzle, but don’t let it bubble.
- Add eggs:
- Bring in the eggs one at a time, beating after each; you’ll see the mixture turn glossy.
- Combine the dry ingredients:
- Sift flour, cocoa, baking powder, and salt, then fold those into your wet mix until just unified (no flour streaks, but don’t overmix).
- Fill and bake:
- Divide the batter between six mini flower pots or pour into the pan; bake until a toothpick comes out with moist, fudgy crumbs, about 20–25 minutes.
- Cool down:
- Give brownies time to cool completely—this sets the fudgy texture, making assembly easy.
- Make the Oreo dirt:
- Crush the cookies (filling and all) in a food processor or bash them in a bag with a rolling pin until they look like garden soil.
- Whip the cream:
- Beat the cold cream with powdered sugar to stiff peaks; doing this by hand is a mini workout, but so satisfying.
- Shape brownies (if needed):
- If you used a pan, cut brownies to fit snugly at the base of each pot—no shame in patching as you go.
- Layer and decorate:
- Spread whipped cream over each brownie, sprinkle lots of Oreo “dirt,” then top with edible flowers, gummies, and a sprig of mint.
- Chill and serve:
- Chill the finished pots until ready to unveil your mini garden at the table.
 Pin It
 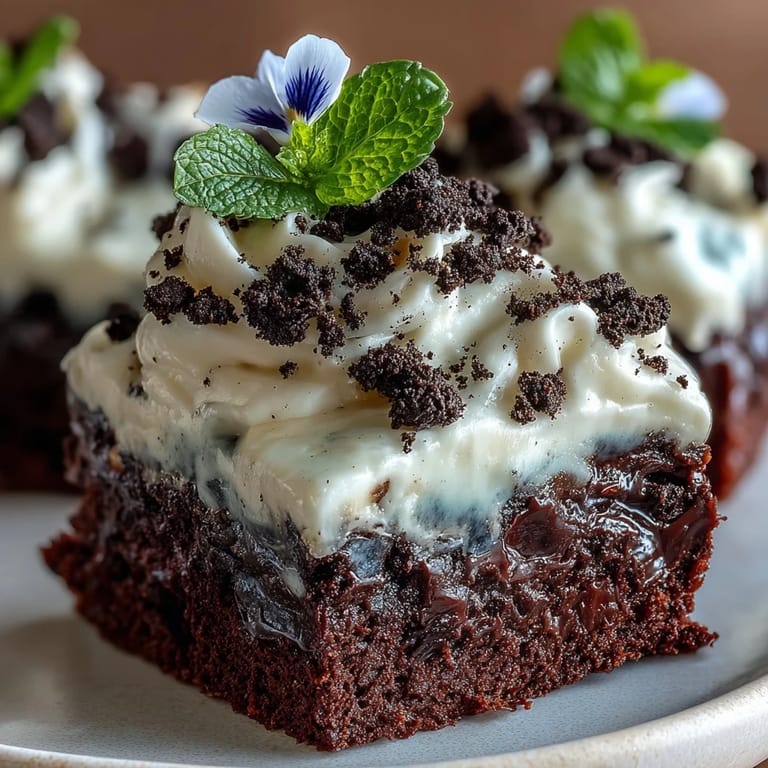 Pin It
 The first time my niece saw these, she genuinely gasped—then asked if she could plant something in a leftover pot afterward. Somehow, a simple dessert turned into a little lesson about gardens, sharing, and playful creativity all at once.
Getting Creative With Decorations
Let kids pick gummy worms or butterflies, or raid the herb garden for sprigs of thyme—each pot becomes a miniature world. When we all compared our “gardens,” no two pots or flower arrangements were ever the same.
Making Brownies In Flower Pots
At first, I worried about baking directly in the pots, but as long as you check they’re oven-safe and line the bottoms, clean-up is as easy as unmolding a cupcake. The rustic, crackly edges that form against the little pots are honestly my favorite bites.
Serving and Storage Secrets
It’s best to assemble just before serving if possible; too long in the fridge and the flowers and cream may wilt or lose their punch. Leftovers rarely last, but if they do, pop a bit of plastic wrap over the pots and refrigerate for up to two days.
- Take brownies out of the oven as soon as crumbs cling to the toothpick for fudginess.
- Be gentle placing flowers so they stay upright and beautiful.
- Rinse edible flowers softly and pat dry very carefully before decorating.
 Pin It
 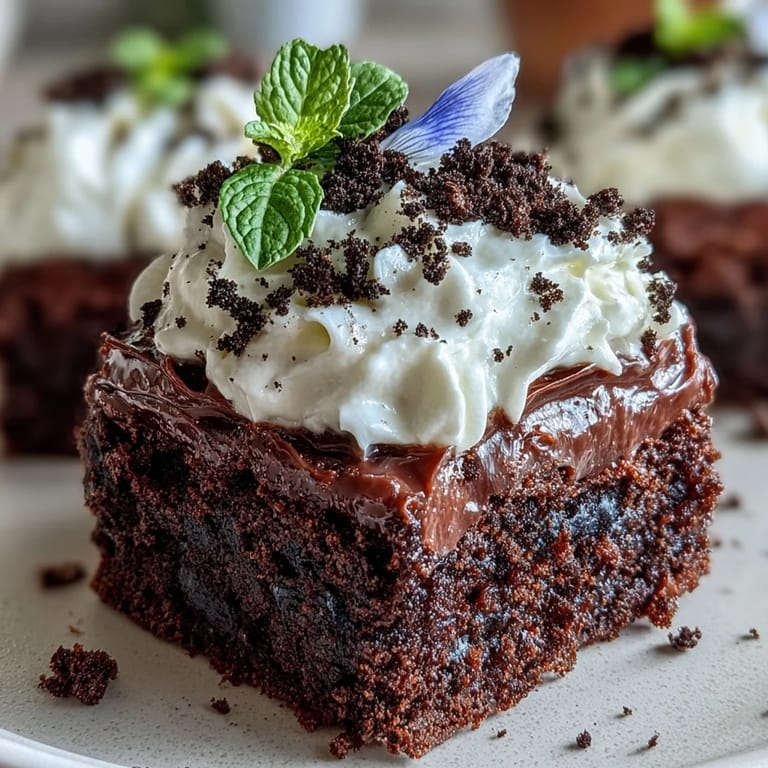 Pin It
 These flower pot brownies don’t just dress up your table—they start conversations and encourage a bit of hands-on fun. Here’s hoping your Mother’s Day (or any day) is brighter for it.
Recipe FAQs
- → Can I use regular ramekins instead of mini flower pots?
Yes. Line the bottoms if needed, or bake the batter in a tray and cut rounds to fit ramekins. Ensure even depth for consistent bake time and check with a toothpick for moist crumbs.
- → How do I keep whipped cream stable for assembly?
Chill the bowl and beaters, use cold heavy cream and powdered sugar, and whip to stiff peaks. For longer holding time, fold in a small amount of mascarpone or use a commercial stabilizer.
- → What can I use instead of Oreos for the 'dirt' layer?
Other chocolate sandwich cookies, crushed chocolate graham crackers, or chocolate wafer cookies all work. Adjust crushing method to achieve fine, soil-like crumbs.
- → Are edible flowers safe to use as decoration?
Only use flowers labeled food-safe from trusted suppliers or farmers' markets. Avoid garden-sourced blooms unless you can confirm they are pesticide-free and edible varieties like violets or pansies.
- → How should leftover assembled pots be stored?
Cover and refrigerate assembled pots for up to 2–3 days. For best texture, consume within 24–48 hours; bring to room temperature briefly before serving if desired.
- → Can components be prepared ahead of time?
Yes. Bake brownies and cool completely, and store crushed cookies in an airtight container. Whip cream just before assembly or stabilize it ahead of time to simplify plating on the day.